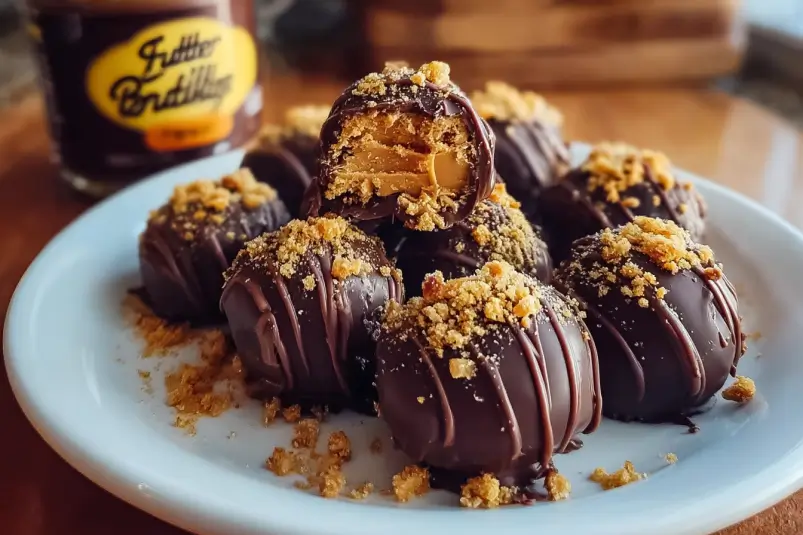
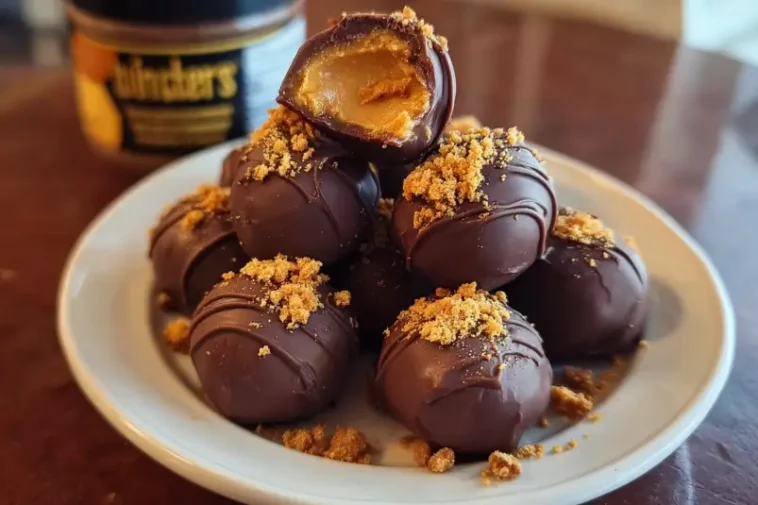
Who doesn’t love the irresistible combination of crunchy, peanut-buttery goodness wrapped in smooth chocolate? Butterfinger candy bars have been a beloved treat for decades, and now, you can recreate that same delicious flavor at home in just a few simple steps. Enter Easy Butterfinger Balls—a no-bake dessert that’s just as fun to make as it is to eat.
These sweet bites of joy are the perfect balance of crunch and creaminess, and they come together in no time at all. Whether you’re preparing for a party, need a quick treat for the holidays, or simply have a sweet tooth to satisfy, Butterfinger balls are sure to impress. Let’s dive into how you can whip up this candy-inspired dessert in 7 simple steps!
Ingredients
To make these delectable Butterfinger Balls, you only need a handful of ingredients, many of which you might already have in your pantry. Here’s the list:
- For the Balls:
- 1 1/2 cups crushed Butterfinger candy bars (about 4-5 full-sized bars)
- 1 cup creamy peanut butter (smooth or crunchy, based on preference)
- 2 cups powdered sugar (for sweetness and structure)
- 1/2 cup unsalted butter, softened
- For the Coating:
- 2 cups milk chocolate chips (or dark chocolate, depending on your taste)
- 1 tablespoon vegetable oil (to help smooth out the chocolate coating)

Instructions
Making Butterfinger Balls is surprisingly easy! Follow these 7 steps, and you’ll have a batch of sweet, crunchy treats ready in no time.
Step 1: Crush the Butterfinger Bars
Start by unwrapping your Butterfinger candy bars. You’ll need to break them down into small pieces. The easiest way to do this is by placing the bars in a ziplock bag and using a rolling pin to crush them into small, fine crumbs. Alternatively, you can use a food processor to chop the bars into tiny bits. Aim for small chunks that resemble the texture of the classic Butterfinger filling.
Step 2: Make the Peanut Butter Mixture
In a large mixing bowl, combine the crushed Butterfinger candy with the creamy peanut butter, softened butter, and powdered sugar. Use a spatula or spoon to stir the mixture until it’s smooth and well combined. You want a thick dough-like consistency that’s firm enough to roll into balls but still soft enough to work with.
Step 3: Shape the Balls
Once the mixture is combined, it’s time to roll it into balls. Scoop out about a tablespoon of the mixture and roll it between your palms to form a ball. Aim for a size similar to a small walnut, so they’re bite-sized but not too tiny. Place the balls on a parchment-lined baking sheet or tray, leaving a little space between each one. Repeat until all the mixture is used up.
Step 4: Chill the Balls
After shaping all the balls, place the tray in the refrigerator to chill for at least 30 minutes. Chilling the balls helps them firm up, making it easier to coat them in the chocolate later. If you have extra time, you can let them chill for up to an hour for maximum firmness.
Step 5: Melt the Chocolate
While the peanut butter balls are chilling, it’s time to prepare the chocolate coating. In a microwave-safe bowl, combine the milk chocolate chips with a tablespoon of vegetable oil. The oil will help thin the chocolate, making it easier to coat the balls evenly. Microwave the chocolate in 20-second intervals, stirring in between, until it’s completely smooth and melted. Be careful not to overheat the chocolate, as it can burn quickly.
Step 6: Coat the Balls
Once the chocolate is melted and smooth, it’s time to dip the chilled peanut butter balls into the chocolate. Using a fork or toothpick, gently dip each ball into the chocolate, covering it completely. Allow any excess chocolate to drip off before returning the coated ball to the parchment paper. Repeat with all the balls.
Step 7: Let the Chocolate Set
After all the balls are coated in chocolate, place the tray back in the fridge to allow the chocolate to harden. This usually takes about 20-30 minutes, depending on the temperature of your fridge. Once the chocolate is set, your Easy Butterfinger Balls are ready to be enjoyed!
Conservation and Storage
If you happen to have leftovers (though that’s unlikely), you can store these Butterfinger Balls for later. Simply place them in an airtight container and keep them in the refrigerator. They should stay fresh for up to 1 week, thanks to the peanut butter and chocolate, which both help preserve the flavor.
If you need to store them for a longer period, these balls can be frozen as well. Arrange the balls in a single layer on a baking sheet and freeze them for about 1 hour. After they’re frozen solid, transfer them to an airtight container or ziplock bag. They will stay fresh in the freezer for up to 2 months. When you’re ready to enjoy them again, just let them thaw at room temperature for 10-15 minutes before eating.
Variations
While the classic Butterfinger Balls are a hit, there are many ways to customize this treat to suit different tastes or occasions. Here are a few fun variations you can try:
- Dark Chocolate Coating: If you prefer a richer chocolate flavor, swap out the milk chocolate chips for dark chocolate chips. The bitterness of dark chocolate pairs perfectly with the sweetness of the peanut butter and Butterfinger mixture.
- Peanut Butter Lovers: For even more peanut butter flavor, add a few tablespoons of chopped peanuts to the mixture. The extra crunch will complement the Butterfinger crumbs and give the balls even more texture.
- Coconut Lovers: Add shredded coconut to the mixture or roll the balls in coconut flakes after dipping them in chocolate. This tropical twist makes the treats feel extra indulgent.
- Mini Butterfinger Balls: If you’re serving these at a party or as bite-sized treats, you can make the balls smaller. Just reduce the amount of the mixture per ball, and adjust the chilling time accordingly.
Serving Suggestions
Easy Butterfinger Balls are versatile enough to be served at a variety of occasions. Here are a few fun ideas for serving them:
- For Parties: Serve them on a large platter or in small paper cups as a cute, easy-to-grab snack. They’re perfect for birthdays, holidays, or any celebration.
- Gift Giving: These balls make great homemade gifts. Arrange them in a decorative tin or cellophane bag, tie them with a ribbon, and you’ve got a thoughtful treat for friends and family.
- Movie Night: Whether you’re watching your favorite film or hosting a cozy movie night, Butterfinger Balls are a fun and easy snack. Pair them with popcorn or other treats for a full movie marathon experience.
- Holiday Goodies: These sweet treats are perfect for the holidays! Pack them in festive gift boxes, or serve them at holiday parties alongside other festive desserts.
Conclusion
Making Easy Butterfinger Balls is a simple and satisfying process that results in a treat everyone will love. Whether you’re craving something sweet, need a quick snack for a gathering, or want to make a batch to share, these bites of perfection are sure to please any crowd. With their rich, peanut buttery center and smooth chocolate coating, they are a delightful combination of flavors and textures.
The best part is that these little candy-inspired treats are completely customizable. You can switch up the chocolate coating, add some fun ingredients, or make them bite-sized for parties. No matter how you make them, Easy Butterfinger Balls will quickly become a favorite in your dessert rotation. Enjoy the sweet perfection, one bite at a time!
Print
Easy Butterfinger Balls: 7 Steps to Sweet Perfection
- Total Time: 40 minutes
- Yield: 20–24 balls 1x
- Diet: Vegetarian
Description
These Easy Butterfinger Balls are a perfect treat for anyone who loves the irresistible combination of crunchy peanut butter and smooth chocolate. Made with crushed Butterfinger candy bars, creamy
Easy Butterfinger Balls are the perfect combination of creamy peanut butter, crunchy Butterfinger candy, and smooth chocolate coating. These no-bake treats come together quickly and are sure to be a hit at parties, holidays, or as a simple indulgent snack. Whether you’re craving something sweet or need a fun, easy dessert to share, these delightful bites offer the perfect balance of flavors and textures.
Ingredients
For the Balls:
1 1/2 cups crushed Butterfinger candy bars (about 4–5 full-sized bars)
1 cup creamy peanut butter (smooth or crunchy, based on preference)
2 cups powdered sugar (for sweetness and structure)
1/2 cup unsalted butter, softened
For the Coating:
2 cups milk chocolate chips (or dark chocolate, depending on your taste)
1 tablespoon vegetable oil (to help smooth out the chocolate coating)
Instructions
Step 1: Crush the Butterfinger Bars
Begin by unwrapping the Butterfinger candy bars. Break them down into small pieces either by placing them in a ziplock bag and using a rolling pin to crush them, or using a food processor to chop them into fine crumbs. Aim for small chunks that resemble the crunchy filling inside the classic Butterfinger bar.
Step 2: Make the Peanut Butter Mixture
In a large mixing bowl, combine the crushed Butterfinger candy with peanut butter, softened butter, and powdered sugar. Stir everything together until it’s smooth and well combined. The consistency should be thick and dough-like, firm enough to roll into balls but still soft enough to work with.
Step 3: Shape the Balls
Scoop out about a tablespoon of the mixture and roll it between your palms to form a ball. Try to keep them bite-sized, about the size of a small walnut. Place each ball on a parchment-lined tray, making sure they have a little space between them. Repeat this process until all the mixture is used up.
Step 4: Chill the Balls
Place the tray in the refrigerator for at least 30 minutes to allow the balls to firm up. If you have extra time, letting them chill for an hour will ensure they’re nice and solid for coating.
Step 5: Melt the Chocolate
While the balls are chilling, melt the chocolate coating. In a microwave-safe bowl, combine the milk chocolate chips and vegetable oil. Heat in 20-second intervals, stirring in between, until the chocolate is fully melted and smooth. Be careful not to overheat the chocolate to prevent burning.
Step 6: Coat the Balls
Once the chocolate is melted, it’s time to dip the peanut butter balls. Using a fork or toothpick, gently dip each ball into the melted chocolate, ensuring it’s completely covered. Allow any excess chocolate to drip off before returning the coated ball to the parchment paper. Repeat this process with all the balls.
Step 7: Let the Chocolate Set
After coating all the balls, place the tray back into the fridge to allow the chocolate to harden. This usually takes about 20-30 minutes, depending on the temperature of your fridge. Once the chocolate is set, your Easy Butterfinger Balls are ready to enjoy!
Notes
If you prefer a richer flavor, use dark chocolate chips for the coating instead of milk chocolate.
For extra crunch, consider adding a few tablespoons of chopped peanuts to the peanut butter mixture.
To make these balls more indulgent, you can also roll them in shredded coconut after dipping them in chocolate.
Make sure to chill the balls for at least 30 minutes to ensure the chocolate coating sticks properly.
- Prep Time: 10 minutes
- Cook Time: 30 minutes
- Category: Dessert
- Method: No-bake
- Cuisine: American
Nutrition
- Serving Size: 1 ball (about 1/20 of the recipe)
- Calories: 160
- Sugar: 14 g
- Sodium: 50 mg
- Fat: 10 g
- Saturated Fat: 3 g
- Unsaturated Fat: 7 g
- Trans Fat: 0 g
- Carbohydrates: 17 g
- Fiber: 1 g
- Protein: 3 g
- Cholesterol: 10 mg
Keywords: Easy Butterfinger Balls, Butterfinger Ball Recipe, Peanut Butter Balls, No-Bake Desserts, Chocolate Peanut Butter Balls, Easy Sweet Treats, Butterfinger Candy Inspired


